This dip is shockingly delicious. It has a wonderful spicy, herby, and garlicky taste. And its (mostly) my own creation! (I adapted the spice mixture from an Emeril recipe for vertical roasted chicken with poultry rub.)
Anyways, there aren't any real "tips" for this recipe b/c it is so friggin' simple. Enjoy!
1 Tbsp garlic powder
2 tsp salt
2 tsp freshly made chili powder
1 tsp paprika (smoked paprika optional)
1 tsp freshly ground cumin
1 tsp dried basil, crushed with your fingers
1 tsp dried oregano, crushed with your fingers
1/2 tsp dried thyme, crushed with your fingers
1/2 tsp freshly ground coriander
1/4 tsp crushed red pepper flakes
1/8 tsp freshly ground black pepper
1/8 tsp cayenne, optional
16 oz sour cream
1 tsp garlic, finely minced
1 Tbsp fresh chives, finely minced
1 1/2 tsp fresh rosemary, finely minced
1 tsp fresh thyme, finely minced
Mix the spices together. Reserve all but 1 1/2 tsp for another purpose.
Mix the 1 1/2 tsp of the spice mixture, garlic, and fresh herbs into the sour cream. Cover and refrigerate for at least 1 hour.
Use as your would plain sour cream (e.g., as a dip for tortilla chips, on a baked potato or eggs, or in chili).
Tuesday, December 16, 2008
Tuesday, December 2, 2008
Turkey Shepherd's Pie
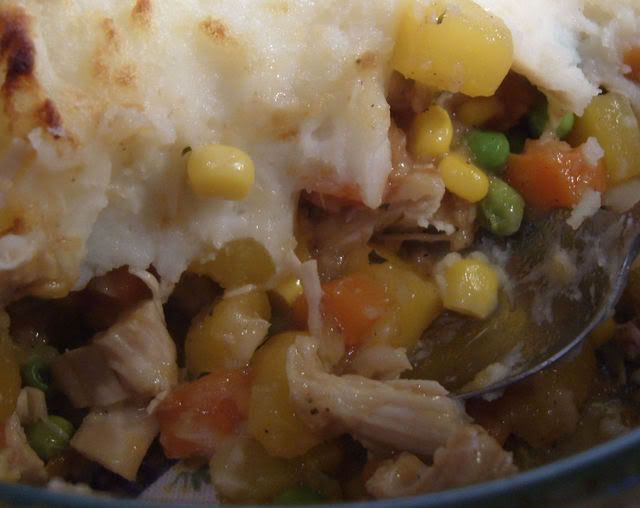
This is a fantastic way to use up Thanksgiving leftovers. I highly recommend it!
A few tips:
- If using gravy instead of some of the stock, make sure to not add too much salt to the sauce - it will reduce and then become too salty. Ye be warned!
- If you use the stock instead of the gravy, you'll need a bit more flour when adding the flour to appropriately thicken
- Dark turkey stock is just like dark chicken stock, except made with a turkey. It's pretty tasty stuff.
- Two pounds of mashed potatoes may be too much, but (a) is there really such a thing as too much potatoes??, and (b) you can just remove some.
- If you're feeling bold, add the brandy separate from the stock mixture and flambe it!
1 1/4 cups dark turkey or chicken stock
1 cup leftover turkey or chicken gravy (or an additional 1 cup stock)
1/2 cup milk
1 tsp Worcestershire sauce
1 tsp ground black pepper
Dash hot sauce
3 Tbsp brandy
3 Tbsp unsalted butter
1 1/2 cup chopped yellow onions (1 medium-to-large onion)
2 carrots, chopped 1/4 inch rounds
1 rib celery, chopped into 1/4 inch slices
1 Tbsp tomato paste
2 Tbsp all-purpose flour (or 3 if using stock instead of gravy)
1 bay leaf
1 cup fresh or frozen peas, thawed
1 cup fresh or frozen corn kernels, thawed
1 lb leftover cooked turkey, cut into bite-size pieces
3 Tbsp parsley
1 1/2 tsp fresh thyme
1/2 tsp fresh rosemary
2 lbs leftover mashed potatoes
3/4 cup white cheddar, grated (optional, but delicious!)
Preheat the oven to 400.
Mix together the stock, gravy, milk, Worcestershire, black pepper, hot sauce, and brandy. Set aside.
Melt the butter in a 12-inch sauté pan over medium heat. Add the onions, carrots, and celery and cook, stirring, for 5-7 minutes, or until the onions are translucent. Add the tomato paste and cook, stirring, until starting to color, about 2-3 minutes. Add the flour and cook, stirring, for 2 minutes. Gradually add the stock mixture and bay leaf, and bring to a boil. Reduce the heat to low and simmer until thickened, about 20 to 25 minutes (less if using gravy b/c it will already be a bit thicker).
Add the peas, corn, turkey, parsley, thyme, and rosemary, and bring to a simmer, stirring occasionally. Remove the pan from the heat and remove the bay leaf. Top with the mashed potatoes, smoothing the top. Sprinkle the cheese over the top and bake until browned and bubbly on top, 10 to 15 minutes. Remove from the oven and serve immediately.
Saturday, November 8, 2008
Ginger cookies with a kick!
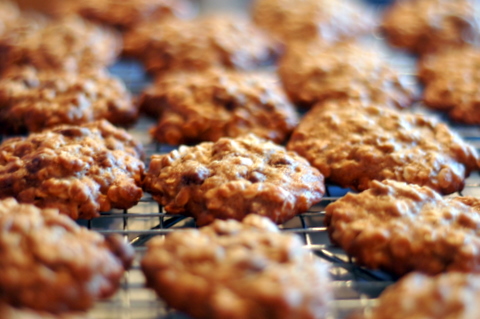
These are seriously delicious ginger cookies. And fairly healthy for you too! It has been adapted from a Cook's Illustrated recipe.
One note: consider substituting the chocolate chips for dried cherries, cranberries or raisins. This would also be delicious. Also, considering adding almond or vanilla extract, if you feel so inclined.
2 sticks unsalted butter, softened
1 cup light brown sugar
1 cup granulated sugar
2 eggs
1 1/2 cups white whole-wheat flour
1/2 teaspoon table salt
1/2 teaspoon baking powder
1/2 teaspoon ground ginger
1/4 teaspoon freshly ground nutmeg
2 1/2 cups rolled oats
1/2 cup crystallized ginger, minced very finely
1 cup chocolate chips
Adjust oven racks to low and middle positions; heat oven to 350 degrees.
In bowl of electric mixer, beat butter until creamy. Add sugars; beat until fluffy, about 3 minutes. Beat in eggs one at a time.
Mix flour, salt, baking powder, ground ginger, nutmeg, and oats together. Stir them into butter-sugar mixture in the electric mixer. Remove the dough from the mixer and put into a bowl. Stir in the chocolate chips and crystallized ginger.
Form dough into balls, placing each one onto parchment-covered cookie sheets. Bake until cookie edges turn golden brown, 22 to 25 minutes. Wait 5 minutes and then remove to a cooling rack. Let cool at least 30 minutes before serving.
Dunk into milk and enjoy.
Tuesday, November 4, 2008
Greek Style "Pizza" Quiche

This is a wonderful quiche recipe, which I definitely like. I called it "pizza" style because the crust bakes up very hard and crisp like a pizza, and the toppings are pizza-esque. You should give it a try : - )
A few tips:
- The dough is going to shrink on you, so just be warned.
- The custard (i.e., the egg and milk mixture) may seep out of the crust if there are any holes, so you want to bake this quiche on a cookie sheet.
- It is really key that you keep the dough nice and cold. The reason why is that you want the butter to stay in its solid form until it goes into the oven. The reason for that is that when the butter melts it will actually create steam in the dough, and this is what gives the dough its nice flaky texture. If you don't mind your dough tasting like cardboard, then don't bother keeping everything cold. But I don't think you'll like that.
- You can substitute milk (even skim milk) for the half-and-half, but it won't taste quite as rich. You can also substitute cream for the half-and-half, but I find that a bit too rich.
- This crust recipe is a little bit more involved b/c it is designed to make a really crisp crust. Too often the crust gets water-logged while baking and ends up really mushy, which I find not too appealing. Thus, I borrowed the crisp crust recipe from Cook's Illustrated.
- About a pound of dried beans make an excellent pie shell weight. The reason for these weights is to prevent the dough from puffing up while it is prebaking (this is the same reason we poke it with lots of holes before putting it in the freezer).
6.25 oz unbleached all-purpose flour
3/4 tsp kosher salt
1 tsp granulated sugar
8 Tbsp unsalted butter (1 stick), cut into 1/4” x 1/4” pieces, frozen
2-3 Tbsp ice water
1 tsp olive oil
1 small onion, sliced thinly
1 clove garlic, minced
1 cup half-and-half
3 eggs
Dash freshly grated nutmeg
1 tsp freshly ground black pepper
1 Tbsp fresh oregano, minced
8-10 cherry tomatoes, cut in half or thirds (depending on how big)
4 oz feta cheese, preferably sheep’s milk, crumbled
5 oz frozen spinach, thawed and thoroughly drained
Put the flour and food processor bowl/blade into the freezer at least 30 minutes prior to making the dough. Also put a medium mixing bowl into the freezer.
Put the flour, salt, and sugar into the food processor fitted with the chilled blade and bowl. Pulse together with three 1-second pulses. Add the butter and pulse together with five to ten 1-second pulses, or until crumbly.
Add 2 tablespoons of the ice water. See if the dough, when pressed in your hand, stays together. If not, add one more tablespoon. Test again. If still not, add one more tablespoon. Move the pieces to a chilled bowl. Without kneading the dough, press into a ball and immediately wrap in plastic wrap and put into the refrigerator for at least 30 minutes.
Preheat oven to 375.
Take dough ball out of refrigerator and put on a well-floured surface. Using a rolling pin, roll the ball into a 13-inch diameter circle. Place this circle into the tart pan and press down. Cover with plastic wrap and place in the freezer for 30 minutes.
Take out of freeze, unwrap, and poke the dough all over with a fork to create lots of small holes. Put a double layer, extra-wide sheet of tin foil that has been sprayed with oil over the tart pan, making sure to cover all the edges. Place pie weights (e.g., 10 oz of dried beans is good) on the tin foil. Bake for about 25-30 minutes, or until the surface of the dough begins to look dry.
Meanwhile, fry to onions in the garlic for approximately 7 minutes in the olive oil over medium-low heat. Add the garlic and fry for an additional minute. Set aside to cool.
At this point, take the pan out of the oven, remove the tin foil and weights, and bake for an additional 5-10 minutes, or until the surface is golden brown. Pull it out and let cool partially.
Whisk the eggs, half-and-half, nutmeg, pepper, and oregano together. Add the onion mixture, spinach, feta, and tomatoes into the tart pan. Pour the custard over this.
Bake for 45-50 minutes, or until the center of the tart feels firm to the touch and the crust is nicely browned. Cool on a wire rack for at least 10 minutes. When ready to serve, remove tart pan ring, and gently slide thin-bladed spatula between tart pan bottom and crust to loosen, then slide tart to
Wednesday, October 29, 2008
Spiced Pumpkin Cookies with Raisins and Oatmeal

Mmmm.... how I love fall food. Like pumpkins. And cookies.
The following is an adaptation of a Food Network recipe found here.
A few tips
- These cookies do not really change shape much during the baking (e.g., they don't flatten out very much), so I recommend shaping them into a ball and then flattening them the way you would a burger patty. This will make them much more "cookie" like in terms of shape.
- I used a medium-grade molasses, but having tried them I think a light grade would be better.
- I prefer Red Flame raisins for this recipe, which are larger and more moist than your standard Thompson raisins. (This is the same variety favored by Zingermans Deli in their famous and amazingly delicious cinnamon raisin bread).
- Do not mistake pumpkin pie filling for pure pumpkin puree. They are not the same, and are not interchangeable in recipes. Pumpkin pie filling has all manner of things in it besides pumpkin like sugars and spices. Pure pumpkin puree is just pumpkin.
- The raisins could easily be substituted for other things like crystallized ginger, dried cranberries, currants, chocolate chips, cinnamon chips, or just about anything else you'd like : - )
- I haven't tried it yet, but I bet that maple syrup (grade B preferably) would be an excellent substitute for the molasses.
1 1/3 cups whole-wheat flour (approx. 6 oz)
1 1/2 cups old-fashioned oatmeal (or whatever is approx. 4 oz)
1 teaspoon baking powder
1/2 teaspoon baking soda
1/2 teaspoon salt
1 teaspoon ground cinnamon
1/2 teaspoon ground ginger
1/4 teaspoon ground allspice
1/4 teaspoon freshly grated nutmeg
3/4 cup canned plain pumpkin puree
3/4 cup packed light brown sugar
2 large eggs
1/4 cup butter, melted and cooled
1/4 cup light molasses
1 cup raisins
Preheat oven to 350°F.
Whisk flour, oats, baking powder, baking soda, salt, cinnamon, ginger, allspice and nutmeg in a
large bowl.
Whisk pumpkin, brown sugar, eggs, butter and molasses in a second bowl until well combined. Stir the wet ingredients and raisins into the dry ingredients until no traces of dry ingredients remain.
Grease the cookie sheets or use parchment paper. Roll the batter into little balls (about 1 inch in diameter), and then flatten each one on the cookie sheets. Bake the cookies for approximately 15-18 minutes, or until firm to the touch. Transfer to a wire rack and let cool.
Tuesday, October 28, 2008
Homemade Applesauce! And Apple Butter!

Homemade applesauce is seriously amazing! I tried it for the first time this weekend and it simply blew me away - I wasn't expecting it to taste nearly as good as it did.
A few tips
- Use a variety of apple types. I don't recall which types I used, but it was at least 4 varieties.
- Buy one of these apple peeler/corer/slicer - it seriously will make this recipe (and any other recipe that calls for peeling, coring, and slicing apples go way faster.
- I like organic apples b/c apples have one of the highest pesticide application rates of any fruit of vegetable (along with strawberries).
- You can add a variety of things to applesauce to change it around: raisins, cranberries, cloves, ginger, crystallized ginger, maple syrup, nutmeg - the list goes on an on.
- A read a blog post that suggested baking applesauce in a halved acorn squash with toasted walnuts, cinnamon, and nutmeg. Sounds delicious!
- Naturally, applesauce is delicious in oatmeal on a cold fall or winter morning!
3.5 lbs apples (about 9-10 apples), peeled, cored, and sliced
2 Tbsp apple cider
Juice of 1 lemon
1/4 honey
1 1x3 inch piece of lemon zest
1 3 inch cinnamon stick
Pinch salt (optional)
Place the prepared apples in a nonreactive 3 or 4 quart saucepan and toss with cider, lemon juice, and honey. Stir to coat. Add the lemon zest and cinnamon stick. Cover and cook over medium until simmering. Turn down to low and simmer very gently for approximately 30 minutes or until the applies are very tender. Stir frequently.
Raise the heat slightly to medium and cook uncovered for 10-15 minutes, beating frequently with a whisk. Add a small pinch salt if desired.
And here is the apple butter recipe! (Which is also a Yellow Farmhouse Cookbook recipe)
1 recipe applesauce above (or 4 cups applesauce)
1/4 cup apple cider
1/4 cup granulated sugar
1/2 cup brown sugar
1/8 tsp freshly grated nutmeg
1/4 tsp allspice
1/4 tsp cloves
1/2 tsp cinnamon
Stir the first 4 ingredients together and place in a casserole dish. Bake at 325 for 3 hours, stirring every half hour. Add the remaining ingredients, stir, and return to the oven for an additional 1. Let cool and then enjoy!
Sunday, October 19, 2008
Italian Sausage, Parmiggiano-Reggiano, and Fennel Soup

This recipe, I'm happy to report, is totally of my own creation! And, amazingly, it's delicious! Who knew!?!
Despite having a fairly long ingredient list, this actually isn't too hard to make, and it doesn't take too long either. The key to it is to use really good brown chicken stock. Regular stock will only make a so-so soup, but brown stock really brings it alive. Also, don't cut out the rinds, salt-packed capers, or fresh herbs - all are essentially to the flavor.
Enjoy!
2 Tbsp extra-virgin olive oil, divided in half
3 Italian sausages
1 tsp red pepper flakes
1 tsp fennel seeds, crushed
2 cloves garlic
1 cup dry white wine
2 quarts brown chicken stock
2 large tomatoes, diced roughly
2 large parmiggiano-reggiano rinds
1 bay leaf
1 tsp freshly ground black pepper
1 Tbsp salt-packed capers, soaked in three changes of water for 5 minutes each
1 1/2 cups small elbow pasta
1 cup frozen green peas
1 Tbsp fresh parsley, minced
1 Tbsp fresh tarragon, minced
Salt, to taste
Parmigianno-reggiano for grating
Extra virgin olive oil, as condiment
Crusty bread, for dipping
Add 1 tablespoon of the oil to a large soup pot over medium-high heat. Add the sausages and cook until well-browned (don’t worry about cooking all the way through – just brown the sausage outsides). Remove the sausages to a plate. Add another tablespoon of oil to the pan and add the red pepper flakes and the fennel seeds. Fry for approx. 1 minute, and then turn the heat down to medium. Add the garlic and fry for approx. 30 seconds, or until the garlic is fragrant. Deglaze the pan with the white wine, and let simmer for approx. 3 minutes, or until slightly reduced.
Add the chicken stock, tomatoes, parmiggiano rinds, bay leaf, pepper, and capers to the pot and bring to a boil. Simmer for approximately 10 minutes. Slice the sausages into rounds, and then add them to the pot. Simmer for 5 minutes. Add the pasta, and simmer for approximately 5-7 minutes. Add in the peas, parsley, and tarragon. Taste for salt.
Serve hot with extra parmiggiano for grating, extra virgin olive oil as a condiment, and crusty bread for dipping (e.g., a baguette).
Chicken Chasseur - French Hunter Chicken

This recipe is seriously God's gift to man. It is that good. It is an adapted version of a Cook's Illustrated recipe that I reallyreallyreally like. Do try it. And note this - it involves fire! Because it involves flambeing a dish, this recipe achieves one of the objectives I had when I started this blog - woot!
A few tips:
- Don't used dried tarragon - the fresh is essential. Indeed, I probably wouldn't make this again unless I had fresh tarragon. If you must, substitute the tarragon with an equal amount of fresh parsley.
- Please use a chimney match when lighting the brandy - you will burn yourself otherwise because the flames jump several feet into the air.
- This dish is excellent with roast potatoes or French potato pancakes (i.e., galette de pomme de terre).
1 whole chicken, about 4 pounds
Kosher salt
Freshly ground black pepper
2 tablespoons olive oil
8 ounces white button mushrooms , cleaned and sliced 1/8 inch thick
1 medium shallot , minced
3 tablespoons brandy
1/2 cup dry white wine
3 1/2 cups brown chicken broth
1 fresh tomato, diced
3 tablespoons unsalted butter (cold), cut into 4 pieces
1 tablespoon minced fresh parsley leaves
1 tablespoon minced fresh tarragon leaves
Adjust oven rack to middle position; heat oven to 400 degrees. Cut chicken into 6 pieces and leaving the skin on, reserving the carcass for another purpose. Sprinkle chicken pieces evenly with salt and pepper. Heat oil in 12-inch skillet over medium-high heat until almost smoking. Add chicken pieces skin side down and cook without moving them until skin is crisp and well browned, 5 to 6 minutes. Using tongs, turn chicken pieces and brown on second side, about 5 minutes longer. Place browned chicken skin side up on rimmed baking sheet and set aside.
Pour off all but 2 tablespoons fat from pan. Add mushrooms and cook over medium heat until mushrooms start to brown, 6 to 8 minutes. Reduce heat to medium and add shallots; cook until softened, about 1 minute longer.
Remove pan from heat and add brandy; let stand until brandy warms slightly, about 10 seconds. Wave lit chimney match over skillet until brandy ignites. Return pan to medium-high heat and shake skillet until flames subside. Add wine; using wooden spoon, scrape browned bits from pan bottom. Simmer briskly until reduced to glaze, about 3 minutes.
Add broth and tomatoes and simmer over medium-high heat. Simmer briskly until liquid, mushrooms, and tomatoes measure approximately 1 1/2 cups, about 25 minutes.
While sauce simmers, place chicken in oven; roast breasts until internal temperature reaches 160 degrees on instant-read thermometer, about 15 to 20 minutes. Transfer breasts to serving platter and tent loosely with foil. Continue to roast thighs/wings and legs until internal temperature reaches 175 degrees, about 10 minutes longer, then transfer to platter with breasts.
When sauce is properly reduced, whisk in butter, one piece at a time, until melted and incorporated. Add parsley and tarragon and adjust seasoning with salt and pepper. Spoon sauce over chicken and serve immediately.
Monday, September 29, 2008
Avocado and Lime Salad
This is a very healthy salad that one might consider. It can feed one as a meal or two as a side. It is quick to make, and delicious! And it is a salad of my own creation! (though the dressing is inspired by a Rachel Ray recipe, I have to admit...).
Tips!
Enjoy!
3 cups mixed greens or spinach
1 ear’s worth of fresh corn, cut from the cob after having been cooked
8 cherry tomatoes, cut in half
1/4 red onion, chopped into small pieces
1 red bell pepper, roasted, deseeded, and chopped
1/4 cup black beans, thoroughly rinsed if from a can, cooked completely otherwise
1 hard-boiled egg, quartered
3 avocadoes, chopped
4 limes, one of them zested
Handful cilantro
2 tsp kosher salt
1 tsp freshly ground black pepper
5 Tbsp water
5 Tbsp extra virgin olive oil
Dressing: Blend together in a food processor or blender the meat of 2 avocadoes, cilantro, salt, pepper, zest, and water. As the processor is running, stream in the olive oil.
Salad: Put the greens, corn, tomatoes, onion, bell pepper, and 1 of the avocadoes into a serving bowl. Top with 3 tablespoons of the avocado lime dressing. Reserve the rest of the dressing for another use.
Tips!
- A few potential additions include grilled shrimp, chopped ham, grilled chicken, shredded roast chicken, or mango!
- The dressing, when blended, will make an emulsion not unlike mayonnaise. This is what gives the dressing its consistent appearance and velvety texture. (To be fair, I'm not entirely sure this is a true emulsion because I'm didn't add an extra emulsifier (e.g., egg yolk, cream, or dijon mustard), which is the key ingredient to an emulsion. That being said, the avocado may have something in it that acts as an emulsifier - I'm not sure).
- Judging the ripeness of an avocado is a tricky thing. You want it to be perfectly ripe, but not bruised (i.e., when you open it there are brown spots where there should be lovely yellow-green colors). I've read of a few methods:
- Hold the avocado in your hand and *gently* squeeze it. If it gives not at all, it isn't ripe. If it gives a little, then it's probably close, and will be good in a few days. If it gives a bit more, then it's ready.
- The green should be somewhere between dark green and black. Purely green avocados are not yet ripe, but purely black ones are probably too ripe. It should be somewhere in between.
- Bigger really is better with avocados - the larger the fruit, the higher the oil content, the better the flavor. Smaller avocados tend to be more watery, and thus less flavorful.
- Note this: If the avocado's skin is looks overly wrinkled, like it's shrunk in on itself, then it's too ripe, and old - pass that one up.
- If you buy a hard, unripened avocado, it can be "ripened" at home with this method: Put it into a brown paper sack with a banana or a tomato, which will give off ethylene gas. This naturally occurring gas helps ripen food.
Enjoy!

3 cups mixed greens or spinach
1 ear’s worth of fresh corn, cut from the cob after having been cooked
8 cherry tomatoes, cut in half
1/4 red onion, chopped into small pieces
1 red bell pepper, roasted, deseeded, and chopped
1/4 cup black beans, thoroughly rinsed if from a can, cooked completely otherwise
1 hard-boiled egg, quartered
3 avocadoes, chopped
4 limes, one of them zested
Handful cilantro
2 tsp kosher salt
1 tsp freshly ground black pepper
5 Tbsp water
5 Tbsp extra virgin olive oil
Dressing: Blend together in a food processor or blender the meat of 2 avocadoes, cilantro, salt, pepper, zest, and water. As the processor is running, stream in the olive oil.
Salad: Put the greens, corn, tomatoes, onion, bell pepper, and 1 of the avocadoes into a serving bowl. Top with 3 tablespoons of the avocado lime dressing. Reserve the rest of the dressing for another use.
Baked Chicken with Tomatoes and White Beans

This recipe is not unlike chicken cacciatore, which is a chicken cooked in tomatoes and onions, and is quite good.
A few tips:
- Before careful around the pan when browning the chicken - the bacon fat has a tendency to pop out of the pan and burn you. It is not fun.
- Don't skip the rinsing of the beans step - canned beans, while convenient, are usually in some form of a thick sauce-like thing that doesn't always taste good. Worse, this thick sauce stuff can totally alter the character of the dish. You have been warned.
- It is best if the chicken pieces are relatively uniform in shape and size. This promotes even cooking.
- In my opinion, salted capers taste waaaaaay better than brined capers. They are a bit harder to find, but I do recommend the extra effort.
- This dish could easily be made with a variety of sausages instead of chicken.
1/4 lb bacon slices, cut into 1-inch pieces
1 1/2 lbs chicken pieces, with skin and bone (e.g., two thighs and two legs)
1/2 teaspoon, plus 1/4 teaspoon salt
1/4 teaspoon freshly ground black pepper
1 1/2 cups chopped yellow onion
1 Tbsp salted capers, rinsed and then soaked in two changes of 1 cup of water for 10 minutes each
1 15 oz can diced tomatoes (or 4-5 medium-to-large fresh tomatoes, skin removed and chopped)
1 15 oz can small white beans, rinsed and drained
Put oven rack in middle position and preheat oven to 350 degrees F.
Cook bacon in a 12-inch heavy ovenproof skillet over medium heat, stirring occasionally, until browned and crisp, about 8 minutes. Transfer bacon with a slotted spoon to paper towels to drain. Drain fat into heat-proof dish. Deglaze the plan with 1/4 water, scrapping the bottom, and then drain the deglazing liquid into a heat-safe bowl. Add the reserved fat back into the pan and raise heat to medium-high.
Pat chicken dry and season with 1/2 teaspoon salt and 1/4 teaspoon pepper. Brown chicken in the 12-inch skillet, turning over once, about 8 minutes total, then transfer chicken with tongs to paper towels to drain. Drain fat again into heat-safe bowl. Deglaze pan again, using the previous deglazing liquid. Again, reserve the deglazing liquid, and add bacon fat once again back into the pan. Lower heat to medium.
Cook onions in skillet with 1/4 teaspoon salt, stirring and scraping up any brown bits, until golden brown, about 10 minutes. Stir tomatoes and capers into onions and boil, uncovered, 3 minutes, to concentrate juices slightly. Stir in bacon and beans and bring to a simmer. Nestle chicken, skin side up, in beans and bake, uncovered, until chicken is cooked through, 20 to 25 minutes.
Serve immediately with crusty bread.Saturday, September 27, 2008
Pumpkin Soup!

Pumpkin soup is wonderful on a cool, rainy fall day. I highly recommend it : - )
The following recipe is a King Arthur Flour recipe that is quite tasty, and a bit fiery. You can find a link to the recipe here.
A few tips:
- This recipe is super easy and quick, so it is good for weekdays.
- This soup is really better as an appetizer in small quantities, or a side dish. But you can add grilled chicken or lil'smokies sausages to make it a more complete meal.
- If your curry powder is already quite hot, you might want to cut back on the cayenne. Also, the cayenne could be taken out entirely and replaced with one or two minced jalapenos.
- Enjoy!
4 tablespoons (1/2 stick) butter
3 garlic cloves, minced or chopped
1 large onion, diced
1 1/4 teaspoons curry powder
1/2 teaspoon salt
1/4 teaspoon ground coriander
1/8 teaspoon cayenne pepper (or more/less to taste)
3 cups brown chicken broth
16-ounce can solid-pack pumpkin
1 can (12 ounces) evaporated milk
Add pumpkin, stirring till smooth. Add evaporated milk. Heat over medium heat for 5 minutes; don't allow soup to boil (but a simmer is OK).
Using an immersion blender, process till very smooth. Serve hot with crusty bread.
Friday, September 26, 2008
Brown Chicken Stock

This is seriously the greatest chicken stock recipe. Ever. Resistance is futile.
Unfortunately, it is not my recipe. But that's okay. It will still rock your world.
The following is a recipe by Craig Common of "The Common Grill," a fantastic restaurant in Chelsea, Michigan. (In my view, one of the better restaurants in all of the southeast Michigan).
A few pointers:
- This recipe does create a stock with a very strong chicken flavor, so it isn't appropriate in all recipes. Two main types of stocks exist: light and brown. Light stock is very similar to brown, except that the bones aren't browned in the oven and the vegetables aren't caramelized before being thrown into the stock. The taste difference is this: light stock has a milder, less "chickeny" flavor, while dark stock has a robust, rich, and deep chicken flavor. I prefer the brown stock for most things I do, but in some recipes it is overpowering. Use your own good judgment.
- Don't skimp on the time required to brown the vegetables or the bones. This is where the extra flavor comes in, so it is an essential step.
- Consider cooling this recipe in a big cooler filled with ice. This process reduces the chance that the stock will pick up extraneous flavors that may reside in your fridge (e.g., blue cheese has a way finding its way into hot stocks, resulting in an unpleasant off taste).
- This recipe can easily be halved. But I think you'll find yourself using it in everything after you've tried it.
5 lb chicken bones
8 Tbsp extra virgin olive oil
2 red onions, sliced thin
2 yellow onions, sliced thin
2 ribs celery, chopped
4 carrots, diced
16 cups water
2 heads garlic, cut in half horizontally
2 sprigs fresh thyme
2 sprigs fresh parsley
2 sprigs fresh basil
4 tsp kosher salt
2 tsp freshly cracked black pepper
Preheat oven to 450.
Roast chicken bones in oven for 1 hour, or until browned. After 30 minutes remove from oven, discard any fat, and flip the bones over. Return to oven for the remaining 30 minutes.
Heat olive oil in 12-quart stockpot over medium heat. Add onions, celery, and carrots and cook until well browned (this process may take anywhere from 30-45 minutes, depending on how hot your pot is). Water may be needed to deglaze the pan occasionally if it gets too brown on the bottom.
Transfer chicken bones to stock pot and add enough water to cover bones by 2 inches. Bring to a boil. Stir in garlic, thyme, parsley, basil, salt, and pepper. Reduce heat to low and simmer for 2 hours. Add water as necessary to keep bones covered.
Strain. Transfer liquid to a clean stockpot. Simmer over low heat for an additional hour. Remove from heat and strain again.
Refrigerate until cool. Use whatever you’d like and then freeze the rest.
Makes 2 quarts approximately.
Monday, September 15, 2008
Bengali Dal (Indian lentils)

Mmmm.... Indian lentils. Delicious! I've read that lentils and rice (i.e., dal and rice) is one of the primary meals in all of India, regardless of region, so it can't be bad : - )
The following is an adaptation of an Emeril Lagasse recipe for Bengali dal. It was quite good, and quite healthy. As it were, neither lentils nor rice by themselves provides a complete protein, but combined they do. As lentils are one of the most protein packed vegetables, this is a good meal for vegetarians.
Tips:
- This recipe is a bit heavy, so I recommend a very light side (e.g., green peas would be good).
- Chana dal is like yellow split peas, but it is different in that it doesn't break down into a mush. Rather, it retains it shape like a bean would.
- Mustard oil and Chana dal are available at your local Indian grocery store.
- Dal is also sometimes spelled "dall" or "dahl"
3 cups chicken stock or water (I prefer brown chicken stock)
5 cloves
1 to 1 1/2 inch cinnamon stick
1 teaspoon salt
1/2 teaspoon turmeric powder
1 teaspoon sugar
1/2 teaspoon cardamom powder
3 tablespoons mustard oil
1 1/2 teaspoons freshly ground cumin
1 teaspoon minced green chili
1/2 teaspoon red chili flakes
3 cups cooked basmati or jasmine rice, hot
Rinse the lentils several times to thoroughly remove any dirt or
debris. Put the peas in a deep, heavy-bottomed pot along with the
water, cloves, cinnamon, salt, turmeric, sugar, and cardamom
powder.
Bring to a boil, stirring well to keep the peas from lumping. Reduce
heat to medium-low and simmer, partially covered, until peas are
cooked tender but still separate, about 25-30 minutes total.
Meanwhile, heat the oil in a skillet over medium-high heat. When it
is hot add the cumin, minced green chili and red chili flakes and
heat until aromatic, 20 to 30 seconds. Pour this perfumed oil over
the peas and stir to combine.
Serve the dal hot over rice.
Enjoy!
Saturday, August 30, 2008
Beef and Polish Sausage Borscht

In my opinion, roasted beets are one of the most under-appreciated root vegetables. They are delicious, especially when added to a simple salad of mixed greens/baby spinach, carrots, diced hard-boiled egg, and a good vinaigrette. But, most Americans know beets only from borscht. The problem with most borschts, including this one, is that it doesn't emphasize the roasted beet flavor enough. My next version of borscht will be a significantly pared down version of this one so as to emphasize the beet flavor.
My suggestions for this recipe are these:
- Don't let the beef or sausages burn. This is very easy to do when you are working on high heat.
- Have the 1/4 water for deglazing ready before you begin frying the beef. It is not hard to burn the pan drippings while getting the water ready at high temperatures.
- You can peel the potatoes if you'd like, but it isn't necessary if they are well cleaned. The same is true for the carrots. The reason why I prefer not to is that a lot of nutrients are in the potato skins and the outer layer of the carrots.
- Be careful to not add too much vinegar - it can dominate everything else.
- Else than that... enjoy the recipe!
1 tablespoon vegetable oil
1/2 lb polish sausage
1/2 lb beef stew meat
1/4 water
1 tbsp olive oil
1 cup chopped yellow onion
1/2 cup shredded carrot
1/2 cup finely chopped celery
1 clove garlic, minced
2 quarts water
1 bay leaf
1/2 teaspoon salt
1 teaspoon ground black pepper
1 cup sour cream
1/2 cup fresh dill, minced
1 large russet potato, diced
2 tablespoons red wine vinegar
Salt and freshly ground black pepper, to taste
Preheat oven to 350 degrees F.
Wrap the beets in individually in tinfoil and place on a baking sheet. Roast until tender, about 1 to 1 1/2 hours. Remove from the oven, unwrap to let the steam out, and let sit until cool enough to handle.
Meanwhile, heat the oil in a large Dutch oven on medium-high heat until hot but not smoking. Cook the sausage until browned on all sides. Remove, let cool a few minutes, slice into bite-size slices, and put into a bowl. Season the beef with salt and pepper, add the beef to the Dutch oven and sear until thoroughly browned on all sides. Remove the meat from the pan and add to the bowl. Deglaze the pan with 1/4 of water. Drain the deglazing liquid into a heat-safe bowl, and reserve.
Reduce heat to medium. Add the olive oil to the Dutch oven. Add the onions, carrot, and celery to the Dutch oven, and stir to coat. Cook until soft, about 5-8 minutes. Add the garlic and cook until fragrant, about 30 seconds to 1 minute. Return the meat to the pot and add the water, bay leaf, reserved deglazing water, salt, and pepper and bring to boil. Reduce the heat to medium-low and simmer partially covered until the beef is tender, about 2 hours.
Meanwhile, once the beets are cool enough to handle, trim the stem and root ends and remove the skins. Coarsely chop half of the beets and shred the other half. Set aside. Also, mix the dill and the sour cream together and set aside.
When the meat is tender and falling apart, add the beets and potatoes. Simmer over low heat for another 30 minutes. Add the red wine vinegar. Season with additional salt and freshly ground black pepper, if necessary.
Ladle borscht into bowls and garnish with a dollop of dill-sour cream.
This recipe is an adaptation of an Emeril Lagasse recipe.
Monday, August 25, 2008
Blue Cheese and Portabella Mushroom Steak Sauce
Delicious! This is a recipe for a cream-based sauce that goes with a pan-fried steak. It is quite tasty. I'm proud to say that, though it is not a particularly inventive combination of ingredients, this particular recipe is of my own creation! It serves about 3-4 people, depending on the steak portion size.
My main tip: Don't overcook the steak. It is really easy on high heat to overcook a thin steak. So don't. Watch it carefully, use a timer, and practice. As always, practice is the key! Also, this sauce could be made just as easily by sauting some skin-on chicken, or with lamb. Both would be delicious.
Without further ado, here is the recipe:
2 Tbsp olive oil
2 large steaks of your choice (3/4 inch thick)
Salt
Freshly ground pepper
1/2 cup white wine (e.g., Sauvignon Blanc works well)
2 Tbsp olive oil
1/4 lb portabella mushrooms, torn in to 1 inch chunks.
1 cup heavy cream
1 sprig of fresh thyme
1/4 lb blue cheese
1 Tbsp butter, unsalted
Salt, to taste
Freshly ground black pepper, to taste
Heat the olive oil in a heavy 12 inch frying pan over medium-high heat until just before it begins to smoke. Season the steaks on both sides with salt and freshly ground black pepper. Add the steaks and sear for 2 minutes. Flip and sear for another 1.5-2 minutes, or until desired doneness (if the steaks are thin, watch them carefully unless you’d like them fully cooked). Remove the steaks from the pan and let rest on a plate; cover the plate with tin foil. Deglaze the pan with the white wine and let reduce by half. Drain the remaining liquid into a bowl, and set aside.
Reduce heat to medium and add the olive oil to the pan. Add the portabella mushrooms to the pan. Fry, stirring occasionally, for approximately 8 minutes, or until they are soft and have released their liquid. Add the cream, thyme, blue cheese, butter, and leftover deglazing sauce. Simmer until the blue cheese and butter have completely melted. Reduce further, if necessary, until desired thickness (keeping in mind that the sauce will thicken as it cools). Season, if necessary, with salt and pepper.
Serve immediately with the steaks.
Saturday, July 12, 2008
Potato Gnocchi with Basil Pesto
Mmmmm... gnocchi.
Gnocchi is the Italian version of dumplings, and they are delicious. The best gnocchi are light and fluffy. Too often you see dense and heavy gnocchi, and are the kind that just sit in your stomach like a brick. But, the recipe below, which is an adaptation of a Cook's Illustrated recipe, is not that way. Properly made, it is wonderfully light and quite pleasant.
Here are some tips:
2 lb russet potatoes
1 egg
1 1/4 to 1 1/2 cups all-purpose flour
1 tsp salt
4 ounces fresh basil leaves
2 cloves garlic
1 ounce pine nuts, lightly toasted
4 ounces extra-virgin olive oil
4 ounces parmiggiano-reggiano, grated
Freshly ground black pepper
Salt, to taste
Heat oven to 400 degrees. Bake potatoes until a metal skewer slides easily through them, 45 minutes to 1 hour, depending on size.
Hold potato with a pot holder or kitchen towel and peel it with a vegetable peeler or paring knife. Rice peeled potato into a large bowl. Peel and rice remaining potatoes. Cool until potatoes are no longer hot, about 15 minutes.
Sprinkle 1 1/4 cups flour and 1 teaspoon salt over warm potatoes. Using your hands, work mixture into a soft, smooth dough. If dough is sticky (which is often the case), add more flour as needed, up to 1 1/2 cups total.
Roll about one-quarter of dough into a long 3/4-inch-thick rope. If rope won’t hold together, return it to bowl with remaining dough and work in more flour as needed. Repeat until all dough is rolled. Cut each rope of dough into 3/4-inch lengths. Let the gnocchi rest while you make the pesto
Put the basil, garlic and pine nuts into a food processor. You may need to do this in two batches, depending on the size of your processor bowl. Turn the processor on and slowly drizzle in the olive oil (or half the oil, if doing two batches). Once all of the basil is processed, put the mixture into one bowl and add in the parmiggiano and black pepper. Taste the mixture and see if it needs salt. If it does, only a little and then taste again. The reason why is that the parmiggiano brings a lot of salt to the mixture, so the pesto will need less than you think.
Bring 4 quarts of water to low boil in large pot. Add 2 teaspoons salt or to taste. Add about one-third of the gnocchi and cook until they float, 1 1/2 to 2 minutes (about 3 minutes for frozen gnocchi). Retrieve gnocchi with slotted spoon and transfer to warm, shallow serving bowl or platter. Repeat cooking process with remaining gnocchi. Gently toss gnocchi with pesto and serve immediately.
Gnocchi is the Italian version of dumplings, and they are delicious. The best gnocchi are light and fluffy. Too often you see dense and heavy gnocchi, and are the kind that just sit in your stomach like a brick. But, the recipe below, which is an adaptation of a Cook's Illustrated recipe, is not that way. Properly made, it is wonderfully light and quite pleasant.
Here are some tips:
- Once you add the flour, do not overknead the gnocchi. This is key because the more you knead the gnocchi dough, the tougher it gets, and less light and fluffy it will be to eat. In fact, I barely knead it all - I mostly just try to mix until the ingredients come together.
- Use a potato ricer instead of a masher. This is actually quite important unless you just destroy the potatoes with the masher. The reason why is that it is very difficult to roll the gnocchi into a long strings if there are any lumps at all. Hence, using a ricer is important. Also, it helps the potatoes cool more quickly.
- Do not boil or steam the potatoes. Instead, bake. I know that boiling and steaming is a more conventional form of cooking potatoes, but you don't want to add any more water than you need to the potatoes. One of the tricky parts of gnocchi is getting the dough to the right consistency, and added water by boiling/steaming makes this much harder to do. Also, you'll have to add more water make the dough the right consistency, and that means you'll be making tougher gnocchi.
- Start with less flour and add more only if needed. The ideal consistency is one that holds together well, but does not stick to the rolling surface. It should almost be tacky, but not really sticky. The ability to judge the appropriate level of sticky-ness comes really only through experience. (If you bake breads from scratch, you'll have a leg up).
- Keep the work surface very clean. Dough obviously sticks to hands. But, dough really sticks to other dough. So, use a metal scrapper or anything you can to keep your rolling surface as clean as you can. I usually scrape it totally clean between batches.
- Practice, practice, practice. Let making anything recipe that involves a dough, only through practice will you get really good at making gnocchi. It is somewhat of an art because you have to learn how to judge the consistency and wetness of the dough. But, you can learn it through practice.
2 lb russet potatoes
1 egg
1 1/4 to 1 1/2 cups all-purpose flour
1 tsp salt
4 ounces fresh basil leaves
2 cloves garlic
1 ounce pine nuts, lightly toasted
4 ounces extra-virgin olive oil
4 ounces parmiggiano-reggiano, grated
Freshly ground black pepper
Salt, to taste
Heat oven to 400 degrees. Bake potatoes until a metal skewer slides easily through them, 45 minutes to 1 hour, depending on size.
Hold potato with a pot holder or kitchen towel and peel it with a vegetable peeler or paring knife. Rice peeled potato into a large bowl. Peel and rice remaining potatoes. Cool until potatoes are no longer hot, about 15 minutes.
Sprinkle 1 1/4 cups flour and 1 teaspoon salt over warm potatoes. Using your hands, work mixture into a soft, smooth dough. If dough is sticky (which is often the case), add more flour as needed, up to 1 1/2 cups total.
Roll about one-quarter of dough into a long 3/4-inch-thick rope. If rope won’t hold together, return it to bowl with remaining dough and work in more flour as needed. Repeat until all dough is rolled. Cut each rope of dough into 3/4-inch lengths. Let the gnocchi rest while you make the pesto
Put the basil, garlic and pine nuts into a food processor. You may need to do this in two batches, depending on the size of your processor bowl. Turn the processor on and slowly drizzle in the olive oil (or half the oil, if doing two batches). Once all of the basil is processed, put the mixture into one bowl and add in the parmiggiano and black pepper. Taste the mixture and see if it needs salt. If it does, only a little and then taste again. The reason why is that the parmiggiano brings a lot of salt to the mixture, so the pesto will need less than you think.
Bring 4 quarts of water to low boil in large pot. Add 2 teaspoons salt or to taste. Add about one-third of the gnocchi and cook until they float, 1 1/2 to 2 minutes (about 3 minutes for frozen gnocchi). Retrieve gnocchi with slotted spoon and transfer to warm, shallow serving bowl or platter. Repeat cooking process with remaining gnocchi. Gently toss gnocchi with pesto and serve immediately.
Saturday, July 5, 2008
Eggs Benedict!

Well, this is (I think) my first posting of something that is actually on the list of things I'd like to learn how over the next couple of years! Eggs Benedict! (and, more importantly, the hollandaise sauce). A hollandaise sauce is an emulsion of egg yolks and butter, and it is delicious. It is also one of the classic French "mother" sauces from which many, many other sauces are derived.
As a huge fan of Eggs Benedict, I am definitely very excited about this posting (rather, I was excited to eat my creation...). The recipe, on the whole, isn't terribly difficult, but the timing of it is somewhat challenging. The main reason why is that, ideally, all four elements of the finished product (i.e., the english muffin, the canadian bacon, the poached egg, and the hollandaise sauce) are all at the correct temperature. I'll explain as I go.
Tips for poaching the eggs:
- Use very fresh eggs for the poached eggs. If you can't see the difference between the "thick" part of the whites and the "thin" part of the whites, then the egg yolks may break when you put them into the water.
- Do not crack the eggs directly into the pan - use a ladle or cup to gently lower them into the hot water. This again helps prevent the eggs from breaking.
- Remove the eggs with a slotted spoon. This will drain the eggs so that whatever you put the eggs into won't be watery.
- Use a thermometer to judge the temperature of the butter and the egg mixture. Eggs will curdle at 150 degrees, so it is imperative to make sure neither the butter nor the egg mixture goes above 145. If it starts to approach 150, immediately take the bowl off the heat and let it cool. You will be able to tell if the sauce is too hot b/c the sauce will appear grainy.
- Always whisk vigorously once you begin adding the butter. If you stop for even a little, there is a good chance that the sauce will rise in temperature and the sauce will curdle. Which does not make for tasty hollandaise.
- The sauce, when finished, will be lemony-yellow in color and have a satiny smooth texture. It should have a luster, but not appear oily.
- The sauce will about triple in volume after all of the butter has been added
- If the sauce is too thick, whisk in a few teaspoons of hot (i.e., 140-145 degree) water or lemon juice.
- Hollandaise does not hold well. It needs to be served almost immediately.
- Lots of things can be added to a hollandaise for variety. Some classics include tarragon and chervil (bearnaise sauce) and blood oranges (maltaise sauce).
- The recipe for the hollandaise, by the way, is here (it is from Emeril). It serves 2-3 people.
1 tablespoon vinegar
1 tsp salt
2 eggs (for poaching)
2 egg yolks
1 tsp lemon juice
Dash hot sauce
1 tbsp hot water (approx. 140-145 degrees)
Salt, to taste
Freshly ground black pepper, to taste
1 stick unsalted butter, melted but quite warm (approx. 140-145 degrees)
2 slices Canadian bacon
2 English muffins, split
Poaching the Eggs:
Heat 3 inches of water in a large saucepan over medium heat until it reaches a bare simmer. Add vinegar and salt. Crack eggs into 2 small cups and slide one by one from the cup into the simmering water. Turn the heat off and cover. Cook until the whites are set and the centers are still soft, approximately 3-5 minutes. Once finished, remove from heat and put in a bowl of ice-cold water. This will stop the cooking process and hold the eggs.
Making the hollandaise:
Set a stainless steel bowl over a pot of water that is creating steaming, but not even simmering yet. Whisk the egg yolks with the lemon juice, hot pepper sauce, and water, until pale yellow in color. Season with salt and pepper. Do not let the bowl touch the water - you only want it in contact with the steam. Remove the bowl from the pot and whisking vigorously, add the butter, 1 teaspoon at a time, until all is incorporated. When you are about half-way through the butter, put a small fry pan on over medium heat and add the canadian bacon. Flip it once after the bottom is nicely browned. Near the end of the butter, toast the muffins.
Putting it all together: Once everything is warm, layer the ingredients from bottom to top: english muffin, canadian bacon, poached egg, hollandaise. Serve immediately.
This is probably one of my all-time favorite breakfast recipes. Enjoy!
Monday, June 30, 2008
Poached Salmon with Herb Cream Sauce

Finally! Another recipe. Like May, June has been a month busy with work and other things.
The following recipe is an adaptation of a Cook's Illustrated recipe, which used slightly different proportions and some different ingredients.
Okay, a few pointers:
- Poaching: What is it? There are a few varieties, but the type used in this recipe is called "shallow poaching." That is cooking something in a shallow, wide pan such that the thing is surrounding, but not submerged in liquid. It combines direct contact with liquid with steaming. Other forms of poaching involved full submersion, and can create equally tasty results (e.g., a stew is akin to a full-submersion poach.
- Don't overcook the salmon. Salmon, when cooked just right, has a lovely, almost velvety texture. Depending on the thickness and the poaching temperature, I do not recommend anything more than about 15 minutes.
- Go easy on the dijon: I happened to eyeball it, and it was waaaaay too dijony and acidic. Please measure.
- Go easy on the white wine: Again, you don't want too much acidity
- Go easy on the lemon juice: Do I sound like a broken record?
- If you can, find a cut of salmon that has even thickness. Sometimes the prepackaged stuff is this way, but more likely it is not. Ask you butcher for an even cut - really, they won't mind. An even cut is important because it means that the meat will all be done at the same time. As mentioned above, overdone salmon isn't really worth eating.
2 lemons
2 shallots, minced (about 4 tablespoons)
1/2 cup dry white wine
1/2 cup water
1 skinless salmon fillet (1 - 1 1/2 lbs), about 1 1/2 inches at thickest part
2 tsp Dijon mustard
4 tablespoons heavy cream
2 tablespoons unsalted butter
3 tablespoons fresh oregano and basil, minced
Salt and ground black pepper
Cut top and bottom off 1 lemon; cut into eight 1/4-inch-thick slices. Cut remaining lemon into 8 wedges and set aside. Arrange lemon slices in single layer across bottom of 12-inch skillet. Scatter 2 tablespoons minced shallots evenly over lemon slices. Add wine and water.
Place salmon fillet in skillet, skinned-side down, on top of lemon slices. Set pan over high heat and bring liquid to simmer. Reduce heat to low, cover, and cook until sides are opaque but center of thickest part is still translucent (or until instant-read thermometer inserted in thickest part registers 125 degrees), 11 to 16 minutes. Remove pan from heat and, using spatula, carefully transfer salmon and lemon slices to a plate and tent loosely with foil.
Return pan to high heat and simmer cooking liquid until slightly thickened and reduced to 2 tablespoons, 4 to 5 minutes. Strain cooking liquid through fine-mesh strainer into medium bowl; discard solids. Return strained liquid to skillet; whisk in Dijon mustard and remaining 2 tablespoons shallot. Simmer over high heat until slightly thickened and reduced to 2 tablespoons, 4 to 5 minutes. Whisk in cream and juice from 1 reserved lemon wedge; simmer 1 minute. Remove from heat; whisk in 2 tablespoons unsalted butter and the minced herbs. Season with salt and pepper.
Season salmon lightly with salt and pepper. Using spatula, carefully lift and tilt salmon fillets to remove lemon slices. Place salmon on serving platter or individual plates and spoon sauce over top. Serve, passing reserved lemon wedges separately.
Tuesday, June 10, 2008
Pasta with Olives, Garlic, and Herbs

Well, I've FINALLY gotten around to cooking something new! Between being sick and starting a new job, and being out of town a lot has meant that I've barely done anything besides work, practice at my martial arts dojo, and spend time with my girlfriend. Whew! Anyways, on to the cooking...
This week's (or it is month's?) recipe hosts a array of classic Mediterranean flavors - garlic, olives, anchovy, parmesan, olive oil, and more! I mean, this recipe seriously has it all. Here are a few tips:
(1) Use great bread for the bread crumbs. Americans have this admittedly understandable, but truly awful (and literally tasteless) habit of using packaged breadcrumbs out of a cardboard cylinder. You know what I'm talking about! Those blue containers at the grocery store that have "original" and "italian" flavored breadcrumbs. Well, be gone bad, cardboardy, and flavorless little devils of the grocery aisle! Instead, buy the BEST bread you can find and make the breadcrumbs yourself! It's easy. Here are some simple instructions:
- Cut the crumbs into thin slices and toast each one until totally dry. Just to be safe, let it sit out over night or for a few days so they are nicely are crunchy.
- Then, pulse them in a food processor until you get crumbs of the right size. If, by the way, you are using bread that is really crusty (e.g., a well-made baguette), then it works better if you pulse the crust separately form the interior (aka the "crumb" of the bread). The reason why is that the crush, being physically harder, will take more pulses.
- Also, don't just run the food processor continuously. If you do, the bread crumbs have a tendency to overheat and get rubbery, which defeats the whole purpose of making bread crumbs that retain their crunchy texture.
(2) Suck it up and buy salt-packed anchovies. First, a LOT of people when they hear of anchovies go, "ewwww! i'll just leave those out..." Well, that is hands-down the biggest mistake you could make for this recipe, or just about any other that calls for anchovies. Anchovies, when used judicially, add an amazing, smoky, briny flavor that don't can't be replicated. Also, they don't taste fishy, especially when cooked into something (e.g., a few fillets are wonderful cooked in a tomato sauce). But, there's a catch - don't buy them unless they are packed in (a) olive oil, preferably extra-virgin, or (b) even better, salt. If you can find them, salt-packed anchovies are well worth the extra dollar or two they'll cost. They are always the best quality.
(3) The lemon in this recipe is key. As an acidic agent, it adds a wonderful balance to the heaviness of the oil. (this is the same reason people add vinegar or lemon juice to vinaigrettes - it cuts through the oilyness, making the dressing taste lighter).
(4) Grilled chicken might work well here. I didn't try it, but I suspect that grilled chicken breast that has been marinated for a few hours in olive oil, white wine, dijon, herbs, garlic, and black pepper would be delicious with this recipe, and provide some protein.
Anyways, here is the recipe! It is an adaptation of a Cook's Illustrated recipe that I like. It serves 4-6.
5 Tbsp extra-virgin olive oil
6 medium garlic cloves, minced (about 2 Tbsp)
1 Tbsp minced anchovy fillets
1 Tbsp tomato paste
3/4 tsp red pepper flakes
1/2 cup drained oil-packed sun-dried tomatoes, rinsed, patted dry, and cut into thin strips
1 cup pitted garlic-marinated green olives, rinsed and coarsely chopped
2 oz bread crumbs from really, really good bread
1 3/4 tsp salt
3/4 lb mezze rigatoni or farfalle
2 oz finely grated parmiggiano-reggiano
3 Tbsp fresh parsley, minced
1 1/2 cups lightly packed fresh basil leaves, roughly torn
Ground black pepper, to taste
1 lemon, cut into wedges
Combine 3 Tbsp olive oil, 1 Tbsp garlic, anchovies, tomato paste, red pepper flakes, sun-dried tomatoes, and olives in a medium bowl. Set aside.
Heat remaining 2 Tbsp olive oil in a 12-inch skillet over medium heat until shimmering. Add the bread crumbs and cook, stirring frequently, until beginning to brown, 4 to 6 minutes. Stir in the remaining garlic and 3/4 tsp salt. Continue to cook, stirring constantly, until garlic is fragrant and bread crumbs are dark golden-brown, 1 to 2 minutes longer. Transfer the crumb mixture to a plate to cool. Wipe out the skillet with paper towels.
Meanwhile, bring 4 quarts water to boil in a large Dutch oven over high heat. Add the pasta and remaining 1 1/2 tsp salt. While the pasta is cooking, return the now empty skillet to medium heat and add the olive mixture. Cook until the olive mixture is aromatic and the oil has turned rusty red, 4 to 6 minutes longer. Remove 3/4 cup of the pasta water from the pot and add to the skillet. Bring to a simmer and cook for 2 minutes. Remove the pan from the heat while the pasta finishes cooking.
When the pasta is just shy of al dente, drain the pasta, and transfer back to the Dutch oven. Add the olive mixture and toss over medium heat until the pasta absorbs most of the liquid, about 2 minutes. Stir in 1/2 cup of the parmiggiano. Remove the pot from heat and stir in the parsley, basil, and black pepper.
Serve immediately with the lemon, remaining parmiggiano, and the bread crumbs.
Tuesday, May 27, 2008
Sick + New job = No new recipe
Alas, the combo of a new, busy job and having a cold mean I didn't cook anything this week. Also, I'll be out of town next week, so there probably won't be a new post then either. We'll see.
Sunday, May 18, 2008
Lamb Shank Korma
This is an Indian curry recipe that is quite delicious, if a bit time-consuming. Depending on your spiciness tolerance, it is medium-ish spicy. It is an adaptation of the lamb shank korma recipe in Camellia Panjabi's book "50 great curries of india," which is an excellent book for curries.
This recipe is interesting for a couple of reasons:
- It uses lamb shanks: This is a cut of meat that American's don't cook with any frequency, but is quite delicious. One should treat it like beef stew meat or any other cut that is best when braised (i.e., browned over high heat and then cooked in liquid over a simmer for hours). Indeed, this recipe is an excellent example of the power of thoroughly browning meat - it increases the flavor enormously.
- It's spicy! I grew up eating virtually no spicy food, so this is a pleasant change (albeit one that makes me sweat a bit...)
- It has spices! I.e., it has interesting spices like coriander, garam masala, mace, and cardamom. Some of these can be a bit difficult to find, but I highly recommend it b/c there really isn't any substitute. Especially for mace, I recommend finding a good Indian grocery store - they usually have an excellent selection of spices.
- It uses saffron! Saffron, which is the world's most expensive spice, is the stigma of a flower. It is traditionally grown in Spain and India, and is a very labor-intensive crop. It is excellent for adding lots of color to dishes and a unique aroma.
As an fyi, plan a full 3 hours to make this recipe.
So, without further ado, here is the recipe:
3 tbsp oil
2 1/2 lbs lamb shanks (about 2 shanks)
2 strands saffron
1 tsp rosewater (or koera)
1/4 cup oil
2 medium onions, thinly sliced
1 1/2 oz cashews or almonds (or a mix)
1-2 jalapenos (remove seeds and pith if you want it milder)
2 bay leaves
1 tbsp ginger, minced
1 tbsp garlic, minced
2 tsp ground coriander
1 tsp garam masala
1 1/2 tsp salt
1 1/2 tsp paprika
1/2 tsp chipotle powder or ground cayenne
3 tbsp full-fat yogurt
3/4 tsp ground mace
3 green cardamom pods, ground
juice of 1 lime
Heat 3 tbsp of the oil over medium-high heat in a large dutch-oven. Thoroughly brown the lamb shanks on all sides. Remove the shanks and deglaze the pan with 1/4 cup of water. Set the deglazing liquid with the meat.
Soak the saffron strands in the rosewater for at least 15 minutes
Heat 4 tbsp of the oil in the dutch-oven over medium to medium-high heat. Fry the onions for 15 minutes or until medium-brown. Add the cashews and almonds and continue to fry for 10-15 more minutes, stirring occasionally, or until the onions are deep brown.
Using a spatula, extract the oil from the onions by pressing them against the side of the pot. Transfer the onions and nuts to a bowl and leave to cool. Place in a food processor and puree.
In the remaining oil, sauté the jalapeno, bay leaves, ginger, garlic, coriander powder, half of the garam masala, and the salt for 10 minutes, stirring continuously. Lower the heat to medium-low. Mix in the paprika, chipotle powder, and yogurt. Add the lamb (but not the deglazing liquid). Stir continuously for 3 minutes and then leave to simmer until the yogurt is absorbed.
Add the friend onion puree and mix well. Add the remaining garam masala, the mace and cardamom powders, and sauté for a couple of minutes. Add the deglazing liquid and 3 3/4 cups water and cook for approximately 2 hours, or until the meat is tender.
Right before serving, add in the rosewater and lime juice and take out the bay leaves. Serve over basmati or jasmine rice.
Monday, May 12, 2008
Chocolate-Dipped Coconut Macaroons!

Mmmm... delicious! These are a relatively simply treat that aren't terribly difficult to make. But, there are a few things that need to be watched out for:
- Many macaroon recipes call for "lightly toasting" the coconut flakes. This is probably a good idea, but they burn super easy, so be careful. And burned coconut flakes smell almost as bad as burned popcorn.
- Double Boiler: Melt the chocolate of medium heat using a double boiler or a heat-safe bowl set over a bowl with 1/2 inch of barely simmer water. This will substantially reduce the chances of burning the chocolate. Also, make sure that the bottom of the bowl isn't touching the water - this defeats the purpose of using a double boiler, which is to heat the bowl slowly through steam.
- Whipping egg whites: This was the main task for me b/c I'd never whipped egg whites before. It isn't to terribly difficult (just keep whipping them with your hand-held or standing mixer), but do keep an eye on them. Overwhipped egg-whites are no fun. A few specific tips on whipping egg whites from "The Professional Chef" by the Culinary Institute of America:
- The egg whites should be at room temperature. They will whip up easier.
- They must be totally free of any trace of yolk. Yolk inhibits the whipping process.
- The bowl and whip must be totally free of any fat. Any fat present will coat the egg white molecules, and prevent them from forming the correct structure.
- The bowl should be large enough to allow the egg whites to expand to 8 to 10 times their size.
- Begin whipping at a slow speed, just until the whites start to losen and become foamy. Then increase the speed until the whites hold soft or medium peaks (see below for description). The reason why you don't want to overbeat the eggs is that they will become "dull, grainy, and dry looking." They also "collapse quickly and separate as they are foled into a base or batter."
- Here is a short description of "soft," "medium", and "stiff" peaks:
- Soft peaks: These are peaks that "barely hold their shape. The peaks tip over when the whip is lifted."
- Medium Peaks: These "become stiffer and retains its shape for a longer time when the beater is lifted from the bowl." (As it were, after reading this description, I believe I had something between soft and medium peaks instead of the suggested stiff peaks when I made the macaroons).
- Stiff Peaks: These "will hold a peak that comes to a sharp point."
4 large egg whites, at room temperature
Pinch salt
1/2 cup granulated sugar
8 oz sweetened shredded coconut, very lightly toasted
8 oz semisweet or bittersweet chocolate chips
Preheat oven to 350 degrees F.
In a totally oil-free and clean mixer fitted with a whip attachment, whip egg whites and salt until they become white and begin to stiffen. Add sugar in 3 parts. Continue to whip until the egg whites are very stiff. Using a rubber spatula fold in toasted coconut.
On parchment-lined cookie sheets, drop a teaspoon of the mixture leaving 1 inch around each cookie. Place into the oven and bake for 15 to 20 minutes. The outside should be golden brown but the insides should still be moist.
Cool cookies on cookie sheets until slightly set, about 2 minutes. Remove to wire rack with metal spatula and cool to room temperature, about 20-30 minutes.
Line two cookie sheets with parchment paper (or use the original ones). Melt 8 ounces chocolate in small heatproof bowl set over pan of almost-simmering water, stirring once or twice, until smooth. Remove from heat. Dip the macaroon bottoms in chocolate, scrape off excess with finger, and place on cookie sheet. Refrigerate until chocolate sets, about 15 minutes.
Enjoy!
Sunday, May 4, 2008
Simple Indian Beef Curry

Ahhh... curry! I love it! Interestingly, this is a simple homestyle curry recipe that doesn't actually even have curry powder. Instead, it uses a variety of spices that make up a simple curry powder.
I don't cook Indian food frequently, but there are a few things I've learned:
(1) Use fresh spices. People don't realize it, but most spices simply lose all or nearly all of their flavor in 6 months to 1 year's time. At the very least, you should always replace all of your spices after 1 year. Honestly, my recommendation is to buy spices in bulk, but to only buy a small, small quantity (e.g., 2 Tbsp or less). This removes the problem of having to keep track of how old something actually is.
(2) When you add the spices, mix them in and let them cook a bit in the hot oil. This brings out their flavor tremendously.
(3) Brown the onions until they are reallyreallyreallyreally brown - this is important for creating a depth of flavor.
(4) Use ghee instead of vegetable oil if possible. Ghee, if you're curious, is a form of clarified butter. But, instead of simply clarifying the butter and then removing the milk solids, ghee is made by letting the milk solids brown in the clarified butter at a low temperature for anywhere from 10-40 minutes so that the butter fats develop a wonderful, strong toasty flavor. It really is superb stuff, and is easy to make. Here is a recipe for it from Alton Brown of the Food Network.
So, without further ado, here is a recipe that I adapted from Camellia Panjabi's "50 Great Curries of India", a book I just recently got and have enjoyed. It is a very basic "beginner" curry that isn't too tricky. The only challenging part is searing the beef chunks without burning them, but don't worry - just keep a close eye on them and check the browning side often so as to not burn them.
3 Tbsp ghee or vegetable oil
Salt
Freshly ground pepper
20 oz beef stew meat
1/2 cup water
2 Tbsp ghee or vegetable oil
2 large yellow onions, small dice
4 cloves garlic, minced
1/2 inch square piece fresh ginger, minced
1 1/2 tsp ground coriander
1/4 tsp turmeric powder
1/2 tsp ground cumin
1/2 tsp garam masala
2 tsp paprika
1 cup water
4 plum tomatoes, deseeded and chopped
2 cups water
Salt to taste
1/2 cup cilantro, minced
Heat the ghee on medium high heat until nearly smoking. Season the beef with salt and pepper. Add half of the beef chunks to the hot oil and brown thoroughly on all sides. Do not let the bottom of the pan burn. Remove the beef chunks and put in a bowl. Deglaze with 1/4 cup water, scrapping all of the browned bits from the bottom and adding the liquid to the beef bowl. Repeat the same process with the second batch of the beef chunks.
Once all of the beef is browned, reduce the pan to medium and add the ghee. Add the onions and brown until thoroughly browned, 20-25 minutes. You will need to scrap the bottom frequently during the last 5-7 minutes. Add the garlic and ginger and cook for about 1 minute. Add the coriander and cook for an additional minute, mixing it into everything. Add the turmeric, cumin, garam masala, and paprika. Cook for about 30 seconds. Add 1 cup water and deglaze the bottom of the pan, scrapping up the brown bits. Let simmer for 10 minutes. Put in the tomatoes and simmer for an additional 5 minutes.
Add the 2 cups water, beef chunks, and beef water. Simmer on medium-low for about 2 hours, or until the beef is fall-apart tender. Serve over basmati or jasmine rice and sprinkle with cilantro just prior to serving.
Enjoy!
Tuesday, April 29, 2008
Fruit Salad with Sweet-Tart Sauce
Alright! A fruit thing! This is new! I don't cook with fruits nearly as often as I should, but this recipe sounded good, and healthy (usually, I eat fruit raw or put it in salads, which if you've never done, is amazing. Try a salad of spinach, walnuts, dried cherries, fresh sliced strawberries, blue cheese, and a raspberry vinaigrette... simply delicious!). Anyways, this week's recipe has a variety of my favorite fruits and is covered in a wonderful lemon-lime sauce. I should note that one of the most exciting things about this recipe for me was roasting the pears, which I've never done before... they were truly amazing! To be fair, it is an adaptation of a Cook's Illustrated recipe.
4 Bosc or Anjou pears, firm
2 Tbsp butter, melted
4 Tbsp sugar
2 mangos, peeled and chopped into bite-size chunks
1 quart strawberries, peeled and chopped into bite-size chunks
1 cup blueberries (thawed if frozen, though fresh are better)
2 lemons, juiced and one of them zested
3 limes, juiced and one of them zested
1/3 cup sugar
Pinch salt
1 inch piece ginger, peeled and chopped
Preheat the oven to 500 F.
Skin the pears, slice them in half, decore them, and cut them into fifths. Toss with the melted butter. Then toss with the sugar. Lay on flat side on a cookie sheet and roast for 10-12 minutes, or until the pears are browned on the bottom. Flip and roast for another 5-7 minutes, or until the bottom is browned. Set aside to cool. Once cool, chop into bite-size chunks.
Meanwhile add the lemon and lime juices, sugar, and salt in a pot and simmer until reduced to a 1/4 cup (a syrupy consistency). Add the ginger and lemon and lime zests and let steep for 2 minutes. Filter the syrup.
Mix the pears, mangoes, strawberries, blueberries together. Add syrup and toss. Chill until ready to serve. It is best to serve it the day it is made b/c the strawberries will get soft and mushy if left overnight.
Enjoy!
Monday, April 21, 2008
Roast Chicken Tips
So, I roasted a chicken this past weekend, and have a few tips I picked up.
1) When roasting a chicken on a horizontal rack at 400 (rather than 350, my previous standard temperature) makes for better browning of the skin.
2) Basting the chicken with butter or oil flavored with deliciousness (e.g., garlic, pepper, and fresh herbs) makes the skin taste a ton better. Try basting once every 15 minutes.
3) Do NOT under any circumstances, after removing the chicken, let the crispy skin sit on a wet surface or any surface at all - this makes the skin not crispy in about five seconds. Instead, let the chicken rest raised on a cooling rack.
4) Test the doneness by thermometer - checking to see if "the juices run clear" is simply not a reliable test - I did it this past weekend and it failed. Miserably. I had to microwave the chicken to get it done. NOT cool!
5) Cook the chicken breast side up until the skin is thoroughly browned.
6) If you stuff the chicken, brine it as well. Stuffing the chicken makes it cook much slower, which at a higher heat makes the chicken dry out. So, brine the chicken in a salt-water mixture. This makes the chicken have a more seasoned taste and prevents it from drying out.
7) Make sure the chicken's skin is thoroughly dry before roasting. If you put a even mildly wet-skinned chicken into the oven, it won't brown or crisp up nearly as well as a dry one.
And that's it! Roast chicken is delicious - I highly recommend it!
Saturday, April 19, 2008
Excellent Mushroom Cream Sauce
So, this week I made a roast chicken with a gravy. It was quite good. However, as it was just kind of made up, and I didn't type the recipe, I figured I would give you something that relied on the same sorts of principles - a cream sauce that is used for roast meats and pasta that I actually created!
It is a combination of yellow or red pearl onions, portabella mushrooms, white wine, dijon mustard, cream, thyme, and rosemary. It is really delicious! The key is twofold: (1) brown the pearl onions thoroughly, and (2) deglaze the pan with the white wine. This makes for a delicious sauce. Here is the recipe, if you want it!
2 T extra-virgin olive oil
8 oz yellow or red pearl onions, skins removed* and left whole
4 oz portabella mushrooms, sliced into small chunks
1 clove garlic
1/2 cup dry white wine
8 oz heavy cream
2 t Dijon mustard, fresh
3 sprigs fresh thyme
1/2 sprig fresh rosemary, tied with twine to the thyme
Salt to taste
Freshly ground black pepper to taste
Heat the olive oil in a medium fry pan over medium high heat until it begins to shimmer, but hasn’t smoked yet. Add the onions and sauté until well browned on all sides, being careful to not break them apart. Add the mushrooms and sauté until they release their juices. Deglaze the pan with the white wine and reduce until most of the liquid is gone, 3-4 minutes. Add the heavy cream and Dijon, and simmer for 10 minutes. Add the herb sprigs and simmer for 5 for minutes. Salt and pepper to taste. Remove the sprigs and serve hot over pasta or grilled meats. Serves 2-3.
*To remove the skins of a pearl onion, bring a pot of water to a boil. Meanwhile, cut the tip of the root end of the onion off. Add the onions and let simmer for 2 minutes. Remove the onions and shock them in an ice bath for 5 minutes. After they are cool, you should be able to just pot the onions out of their skins. It's easy!
Sunday, April 13, 2008
Salmon in Lemon Brodetto with Pea Puree!
 This was excellent. This is a Giada De Laurentiis recipe from the Food Network (link below).
So, this is a seared salmon (seasoned with salt and pepper) set atop a puree of peas, garlic, olive oil, parmigiano-reggiano, mint, and salt/pepper (much like pesto, but made with peas instead). As you can see, the salmon and pea puree are sitting in a chicken broth sauce flavored with sauteed shallots, lemon zest, lemon juice, and fresh mint leaves. It was really good - definitely the best of the blog so far.
I'd give it a 4 out of 5.
Here's a link to it: http://www.foodnetwork.com/food/recipes/recipe/0,,FOOD_9936_35789,00.html
The reason for making this is twofold. First, the most important, was learning how to sear salmon. Even though I like seafood generally, I rarely cook fish and I even more rarely sear it in a pan (usually, I bake). Given the lessons mentioned below re: searing the fillets, I think it was a success. Second, I like this dish's presentation. Thought presentation isn't that important for home cooks, the proverbial "they" always say that people eat with their eyes before they eat with their mouths. So, perhaps presentation ought to become more important for the home cook?
So, what are my general comments on the cooking itself? First, searing the salmon: don't do it with the skin on. Even with a non-stick pan with tons of olive oil, the skin stuck like a bitch, making the flip of the salmon almost impossible. In addition, the fact that parts of the fillet stuck to the pan and parts didn't lead to a disintegration of the overall fillet. But, as an added bonus, the skin did become so crispy and tasty that it made an excellent snack. Also, the thinner part of the salmon cooked substantially quicker than the thicker, so trim this part off and cook it as a separate piece so you can remove it when it is done (overcooking done meat is usually makes meat tough, dry, and generally not as flavorful). Also, make sure to sear the top if the fillet until it has a lovely reddish-gold crust on it - the extra crunchyness and flavor is wonderful.
Second, I recommend 1 3/4 cup chicken broth instead of 2 cups, but only because I prefer a slightly stronger lemon flavor. Third, make sure to make the puree in a food processor - my girlfriend and I used a blender and she had to labor through several batches despite the small quantity of puree. Lastly, the presentation of this dish was nice not only because it looked good, but also because it had a functional value - by separating the three components (relatively) in the final product (as opposed to merely mixing them altogether and them serving), the eater is allowed to taste each component alone and then mix them together. This allows each component's flavor to come out clean and distinct, but also allows them to meld. It is an excellent set-up in that regard.
Try this recipe! It's relatively easy, requires little special equipment (merely a zester), and is delicious!
For a close-up picture, see this:

Wednesday, April 9, 2008
Cheddar Cheese Soup!
 Mmmmm... delicious! There's few things better on a cold, brisk day that a bowl of cheddar soup. I grew up with my mom's recipe, which is incredibly cheesy and delicious.
 Alas, the recipe I just made wasn't quite that good. It consisted of butter, onions, carrot, celery, garlic, chicken broth, half and half, bay leaf, dry sherry, sharp cheddar cheese, and thyme. It was supposed to have cayenne, but I didn't have any. Not surprisingly, it came from a Cook's Illustrated issue.
I choose this recipe as an exercise in temperature control - specifically, an exercise in maintaining an emulsion. Cheddar cheese is an emulsion of fat and liquid, but to maintain that emulsion the soup cannot rise above a certain temperature. (An emulsion is when tiny droplets of one liquid are suspended in another - e.g., mayonnaise is an emulsion of egg and oil. The problem is that these can easily "break," causing the oil to separate out and become visible splotches on the surface of the liquid).
Indeed, this recipe called for the cheese to be added at the very end, after the soup had been cooling for a few minutes off the heat. While this did maintain the emulsion (which is good), the flavor wasn't nearly as cheddary as I remembered my mother's being. At first, I added some worcestershire sauce for depth and some chiptole chile powder for smoky heat. This helped. But, I think next time I'll add a good bit of grated parmigiano-reggiano for more cheese flavor and perhaps bacon instead of the chile chiptole powder. Hopefully that'll help.
Anyways, next week will be a Giada De Laurentiis recipe (she's a Food Network chef) called "Salmon in Lemon Brodetto with Pea Puree." I'm pretty excited. I'm looking forward to it b/c (a) I don't cook salmon that often, and (b) the vegetable puree is something I rarely do. And it looks pretty healthy. And I'll actually be able to post the recipe! (I've refrained from posting recipes I got from books b/c they are copyrighted. The Food Network recipes, while copyrighted, are already available free on the internet, so I don't feel bad about posting a link to the recipe).
Saturday, April 5, 2008
Flavor memories and mindful eating
This blog posting isn't about a recipe per se, but about the relationship between mindful eating and what I call "flavor memories." Indeed, in terms of advanced cooking, this idea is a very important to recognizing the individual flavors that make a food be "complex."
First, a brief definition of mindful eating: Mindful eating is the process of eating with intention - i.e., it is paying attention not just to what the food you are eating tastes like, but also what it smells like, looks like, feels like, and sounds like (yes! sounds like! many foods have a "sound" if you pay attention).
Mindful eating as a practice has been common historically in many other cultures, but, sadly, is rarely practiced in ours. You'd be amazed at the number of people who sit at a table or in front of the TV furiously shoving food into their mouth, and didn't take the time to even mildly enjoy the food. As a test, can you name off exactly all of the food you've eaten in the past 24 hours? Most people can't, and I bet you're one of them.
As an exercise, try the following: Take your favorite piece of fresh fruit and do following things:
The reason I go on and on regarding mindful eating isn't just because it is a very interesting exercise that generally improves one's enjoyment of food, but also because it is a useful technique for developing what I call "flavor memories." To be clear, a flavor memory is not this: tasting a tomato salad, and being transported to my grandma's back porch on a hot summer's day when I was a young child. Rather, it is a distinct memory of the particular flavor(s) that make up a particular food item. E.g., what exactly does a strawberry taste like to you? Can you clearly recall the flavor without actually being in the presence of a strawberry? If you can, your mouth probably just started to water just a bit.
Mindful eating is useful to develop memories because it helps you remember what a given food item or dish actually tasted like. And, as mindful eating becomes more and more a part of your regular practice, developing flavor memories becomes easier.
Why would one want to develop flavor memories? When someone describes a wine as having "notes of cherry, plum, and oak" you won't have to look at them like they are crazy. Instead, you'll be able to taste the wine, pick out the individual flavors that you taste, and see if you agree. Indeed, having a large breadth of flavor memories is useful for eating any food that can be described as "complex" (e.g., any fermented product - cheeses, beer, vinegars, bread, good soy sauces, Thai fish sauce, etc...)
So, the next time you eat something, pay attention to how it tastes. This is a great way to really appreciate what you eat more.
First, a brief definition of mindful eating: Mindful eating is the process of eating with intention - i.e., it is paying attention not just to what the food you are eating tastes like, but also what it smells like, looks like, feels like, and sounds like (yes! sounds like! many foods have a "sound" if you pay attention).
Mindful eating as a practice has been common historically in many other cultures, but, sadly, is rarely practiced in ours. You'd be amazed at the number of people who sit at a table or in front of the TV furiously shoving food into their mouth, and didn't take the time to even mildly enjoy the food. As a test, can you name off exactly all of the food you've eaten in the past 24 hours? Most people can't, and I bet you're one of them.
As an exercise, try the following: Take your favorite piece of fresh fruit and do following things:
- First, imagine where the fruit came from. Think of the ground it was grown in (what color is the dirt? Deep, rich brown?). What does the man/woman who grew it look like to you? How do you imagine them? Where is the field/orchard set? A forest? A huge orchard on a smooth plain? The Midwest? California? Chile? What do you think?
- Before you cut into it, feel the texture of the fruit. How would you describe it? Smooth? Waxy? Bumpy? Mushy?
- Next, describe the color of the fruit? What color is it? Is it vibrant? Dull? Shiny?
- Now, cut into the fruit with a sharp knife. How does the knife go through the fruit? Easily? Is force needed? Like a warm knife into butter?
- Now, don't eat it (yet). Take the piece of fruit and compare the exterior color to the interior color. Are they the same? How many different colors are there? How many different shades? Really examine the fruit.
- Next, close your eyes and smell the fruit. How does it smell? Fresh? Fruity? Can you "smell" the acidity? (e.g., a green apple). Bright? Describe it with words as precisely as you can.
- Now, with your eyes still closed, take a small bite, but don't swallow it yet. Chew it. Slowly. What does it feel like on your tongue? Again, what is the texture like? Pass the piece from the left to the right side of your mouth multiple times. Can you taste more than one flavor?
- Next, swallow, but continue to pay attention to the flavors at the back of your throat. I often find I discover an additional layer of flavor as I swallow.
- Finally, let the flavor linger in your mouth for two whole minutes. Does the flavor change? Often, as the acids in your saliva begins to break down the sugars in your mouth new flavors will emerge, after you've swallowed the food.
The reason I go on and on regarding mindful eating isn't just because it is a very interesting exercise that generally improves one's enjoyment of food, but also because it is a useful technique for developing what I call "flavor memories." To be clear, a flavor memory is not this: tasting a tomato salad, and being transported to my grandma's back porch on a hot summer's day when I was a young child. Rather, it is a distinct memory of the particular flavor(s) that make up a particular food item. E.g., what exactly does a strawberry taste like to you? Can you clearly recall the flavor without actually being in the presence of a strawberry? If you can, your mouth probably just started to water just a bit.
Mindful eating is useful to develop memories because it helps you remember what a given food item or dish actually tasted like. And, as mindful eating becomes more and more a part of your regular practice, developing flavor memories becomes easier.
Why would one want to develop flavor memories? When someone describes a wine as having "notes of cherry, plum, and oak" you won't have to look at them like they are crazy. Instead, you'll be able to taste the wine, pick out the individual flavors that you taste, and see if you agree. Indeed, having a large breadth of flavor memories is useful for eating any food that can be described as "complex" (e.g., any fermented product - cheeses, beer, vinegars, bread, good soy sauces, Thai fish sauce, etc...)
So, the next time you eat something, pay attention to how it tastes. This is a great way to really appreciate what you eat more.
Subscribe to:
Posts (Atom)
